Creating a blog with Next, Chakra, Vercel, Ghost CMS, and Simply Analytics
In this article I explained how I made my personal website using some cool technologies I wanted to check out including NextJs, Vercel, Ghost CMS, and SimplyAnalytics
Creating this blog! NextJs + Chakra UI + Vercel + Ghost CMS + Simply Analytics
Ghost CMS Set Up (Digital Ocean)
I was using Strapi for most projects, but they got rid of the one click installation in Digital Ocean. From sheer laziness and curiosity of checking out Ghost CMS I decided to give it a shot and see how I like it. (Its been great so far)
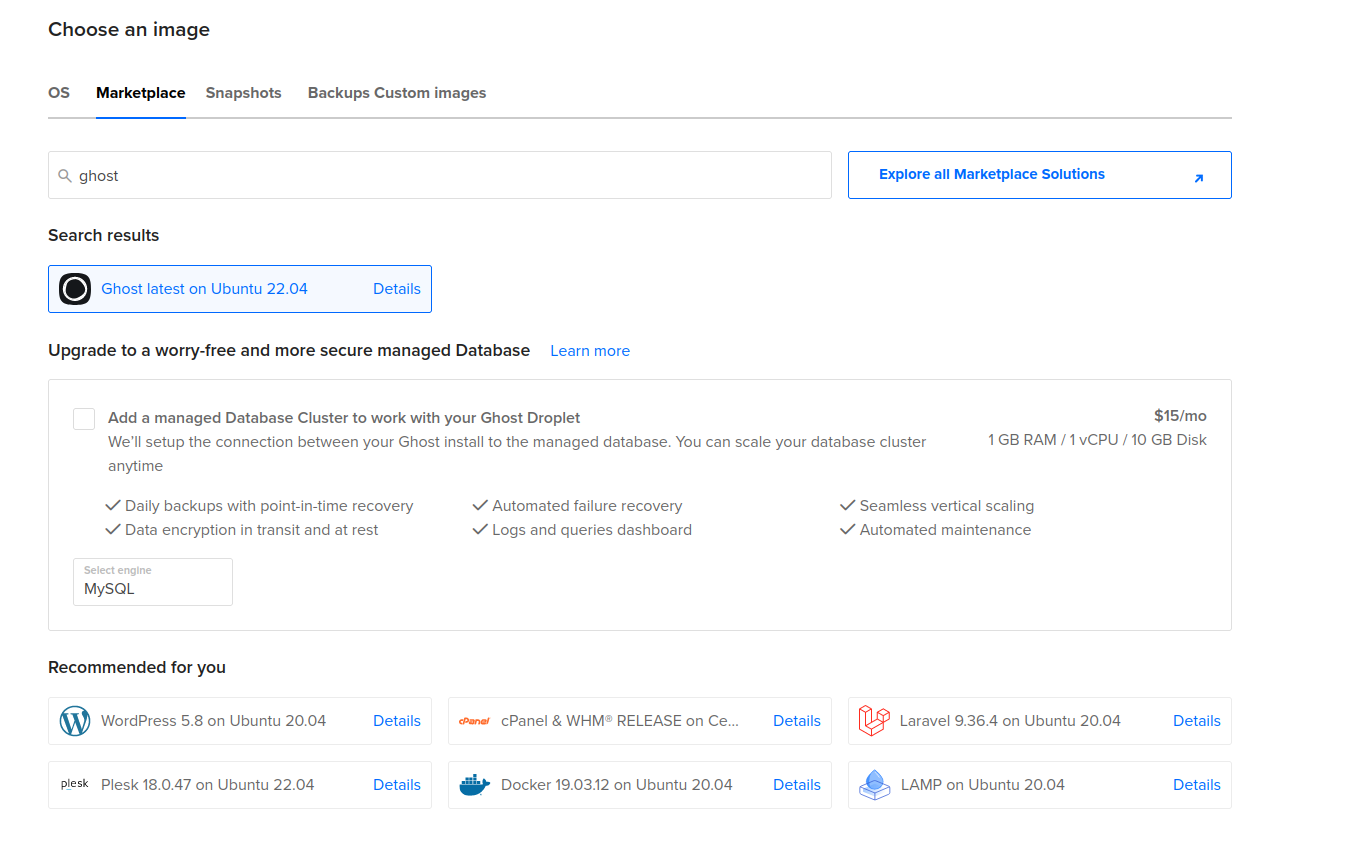
Install Droplet with Digital Ocean 1-Click Installation
Very straight forward, I went with the cheapest option available, $5 a month plan, with the enabled backups for $1 a month (always good to have).
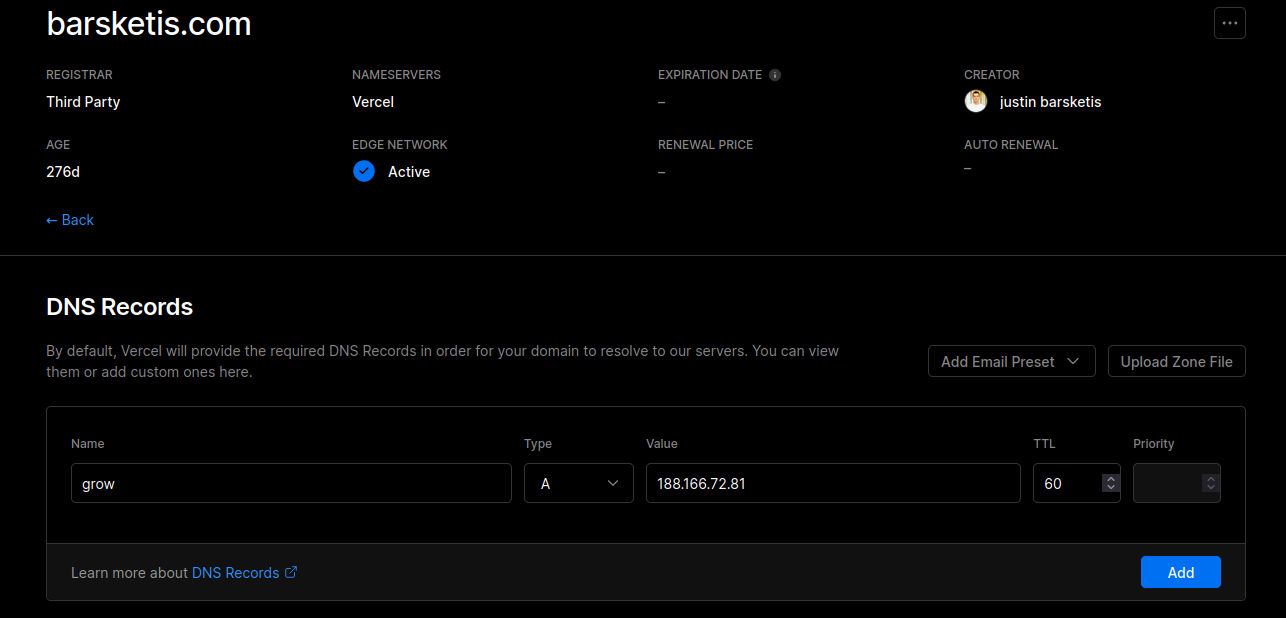
Set Up DNS A Records from your domain
Set up an A record in my DNS provider, in this instance I am using Vercel as they are managing the front end, I used grow.barsketis.com
Note this can take a while to propagate depending on your host (especially if for some reason your using a sub par service like GoDaddy). You can check if the change worked by typing into your terminal
host grow.barsketis.comThis will check the DNS records and propagated correctly will return your server IP address. Vercel was pretty quick, I know route 54 with AWS is as well.
Ssh into the project and go through the configuration (this took about 5 minutes, be patient while it runs).
ssh root@123.123.123.123I had to type in my configured domain, and email address for LetsEncrypt SSL, and it worked! Note I am using a subdomain instead of my root domain, if you just want to use Ghost CMS vanilla installation use your root domain.
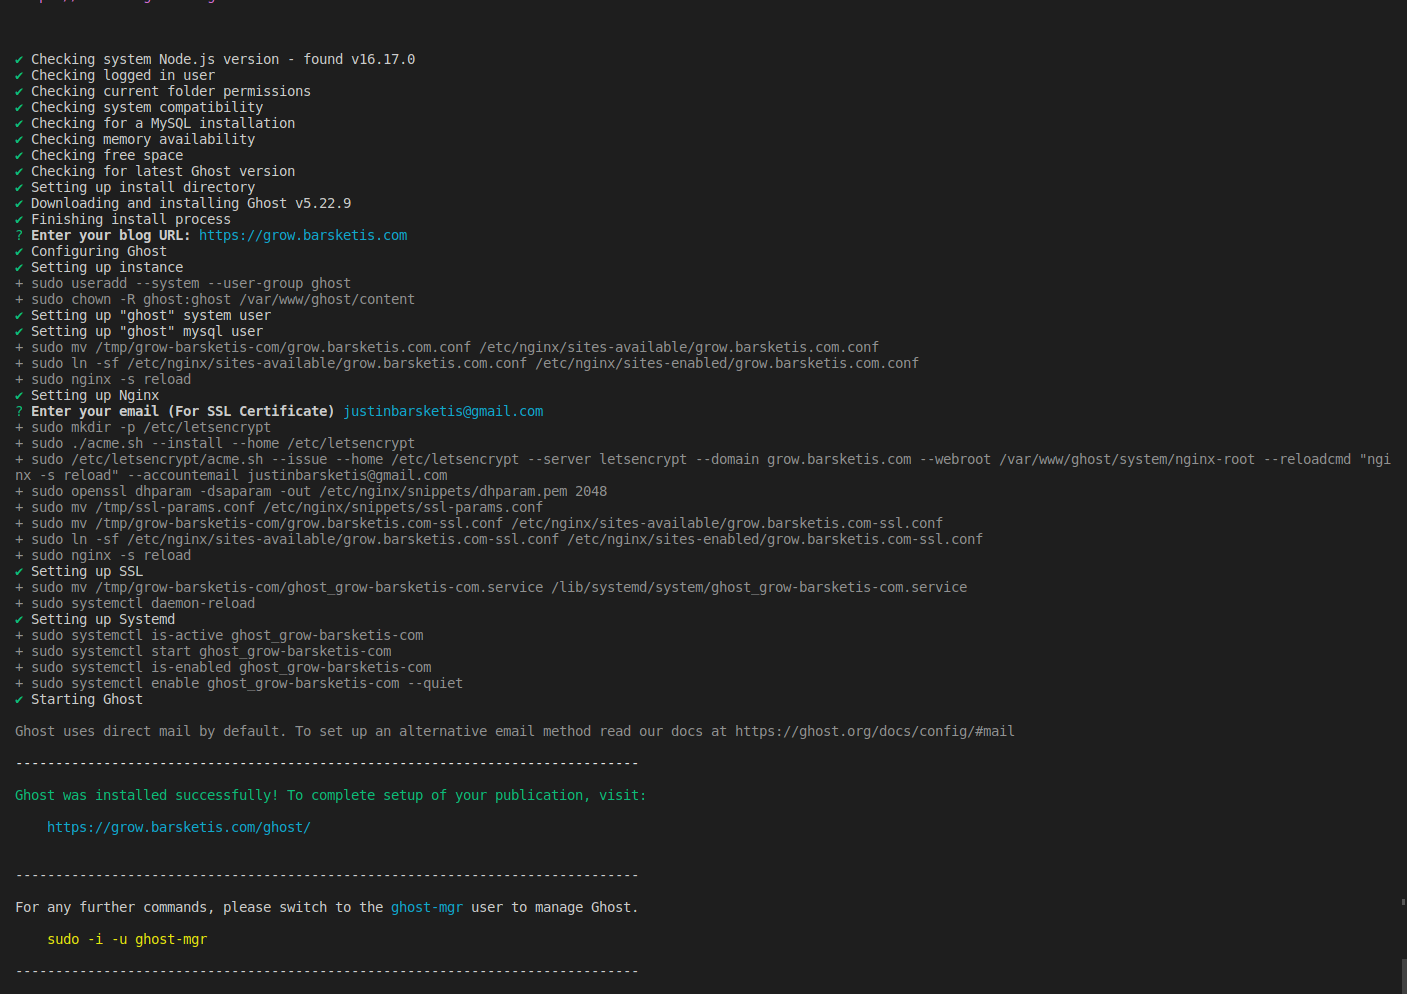
Go to https://grow.barsketis.com/ghost/ to finalize installation
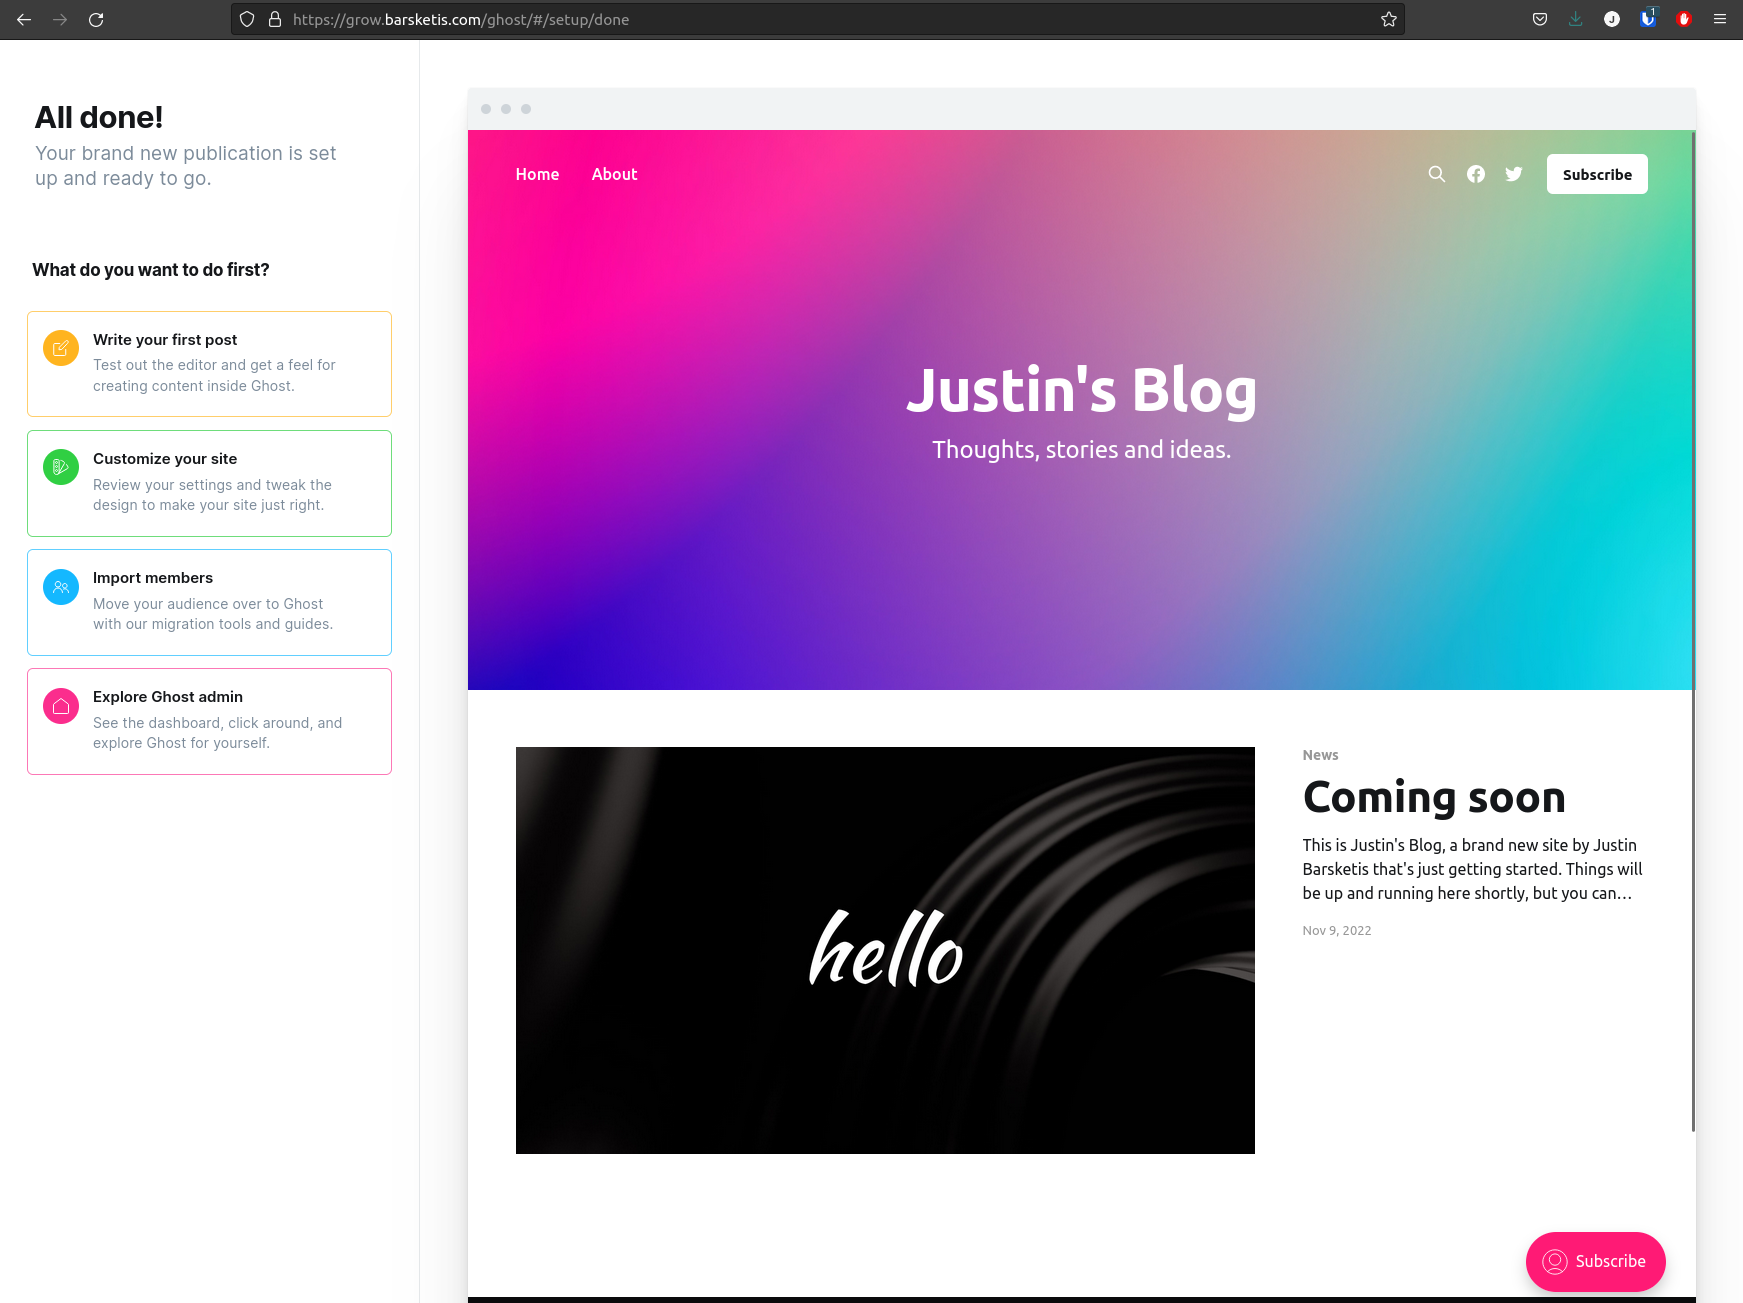
Now at this point, you can call it quits and just use Ghost CMS out of th box. Ill have to admit, I almost scraped my old website completely and stuck with it, what a great service. Check out some of the templates and plethora of features.
I want to make a custom template with NextJs and just use Ghost as a headless CMS because I want to gave a bit more control over the website so ill be disabling the front end facing website using the password protection feature. Sorry Ghost!
Install Chakra UI + NextJS
I wont go into this as surely it will change by the time you read this, just follow the official instructions here.

Integrating NextJs with GhostCMS
To start you need to create an API endpoint on your Ghost CMS, this is done clicking the "Add Custom Integration" in the settings, fairly straight forward.
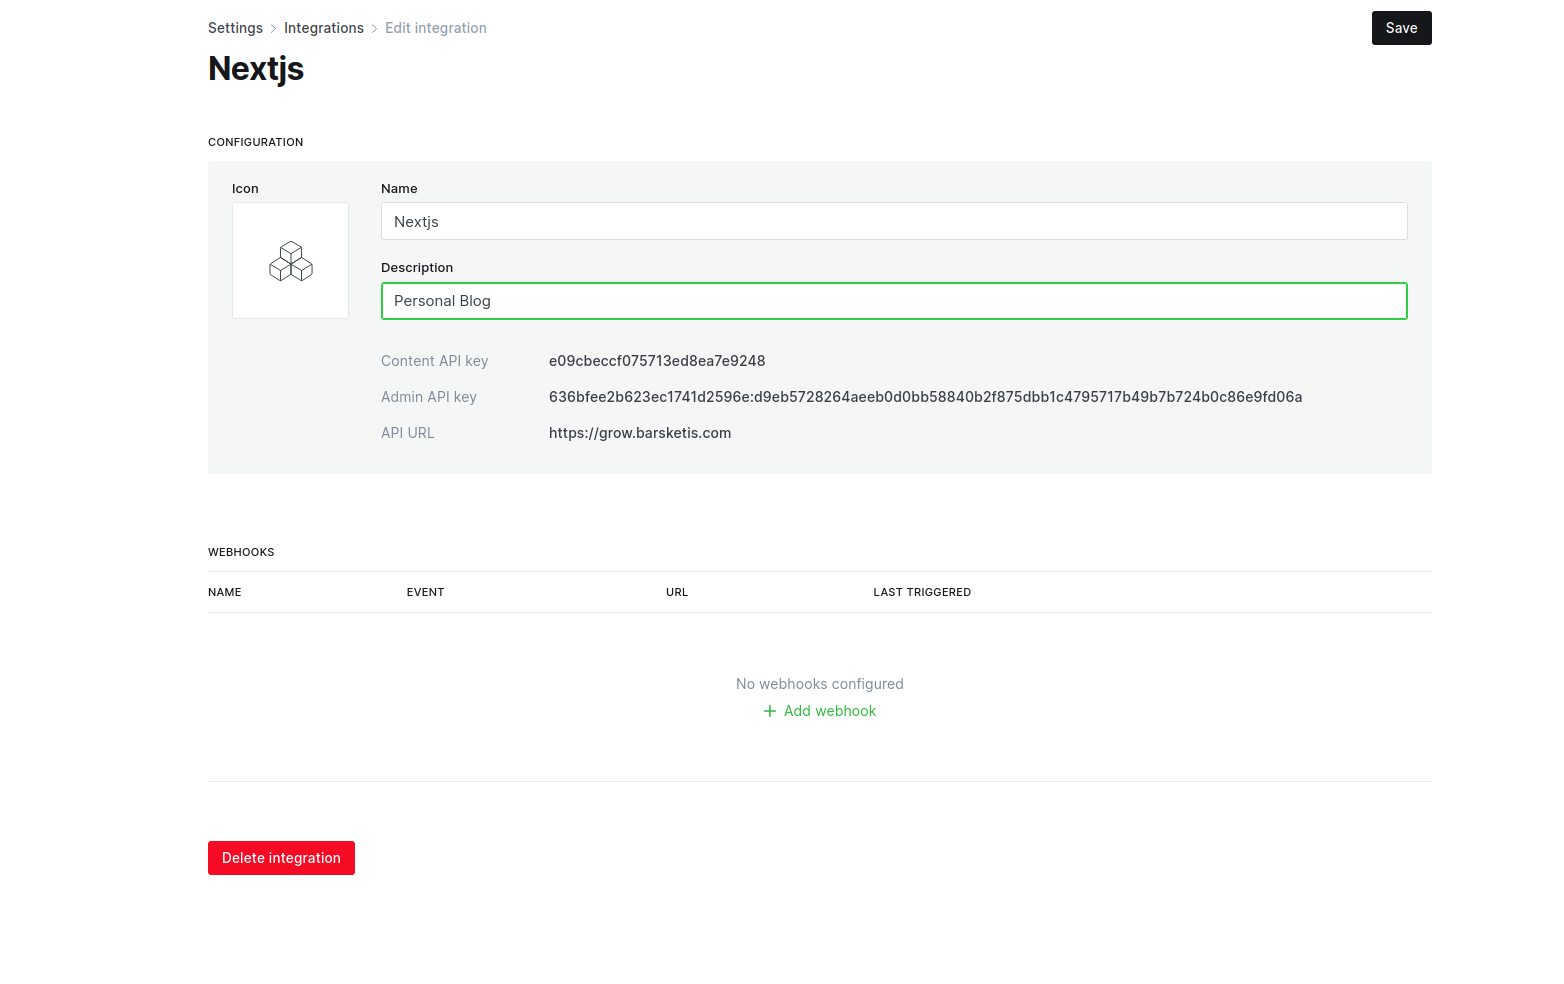
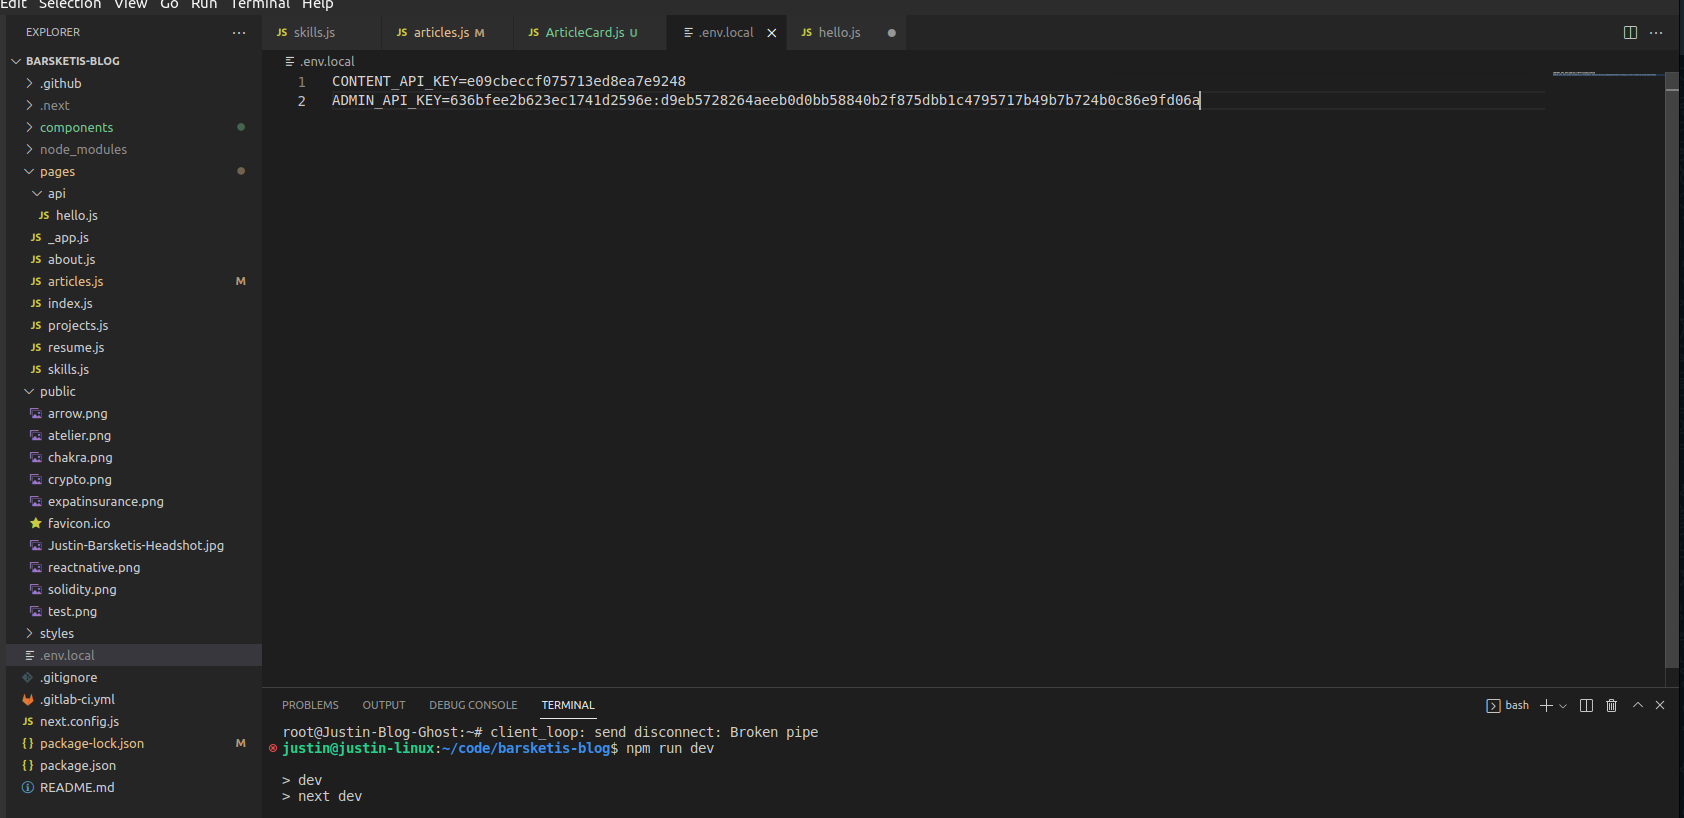
Add the keys locally by creating a .env.local file, and reload your dev environment. (I did change my api keys guys, and ignore the :, should be an = sign in the second key :D)
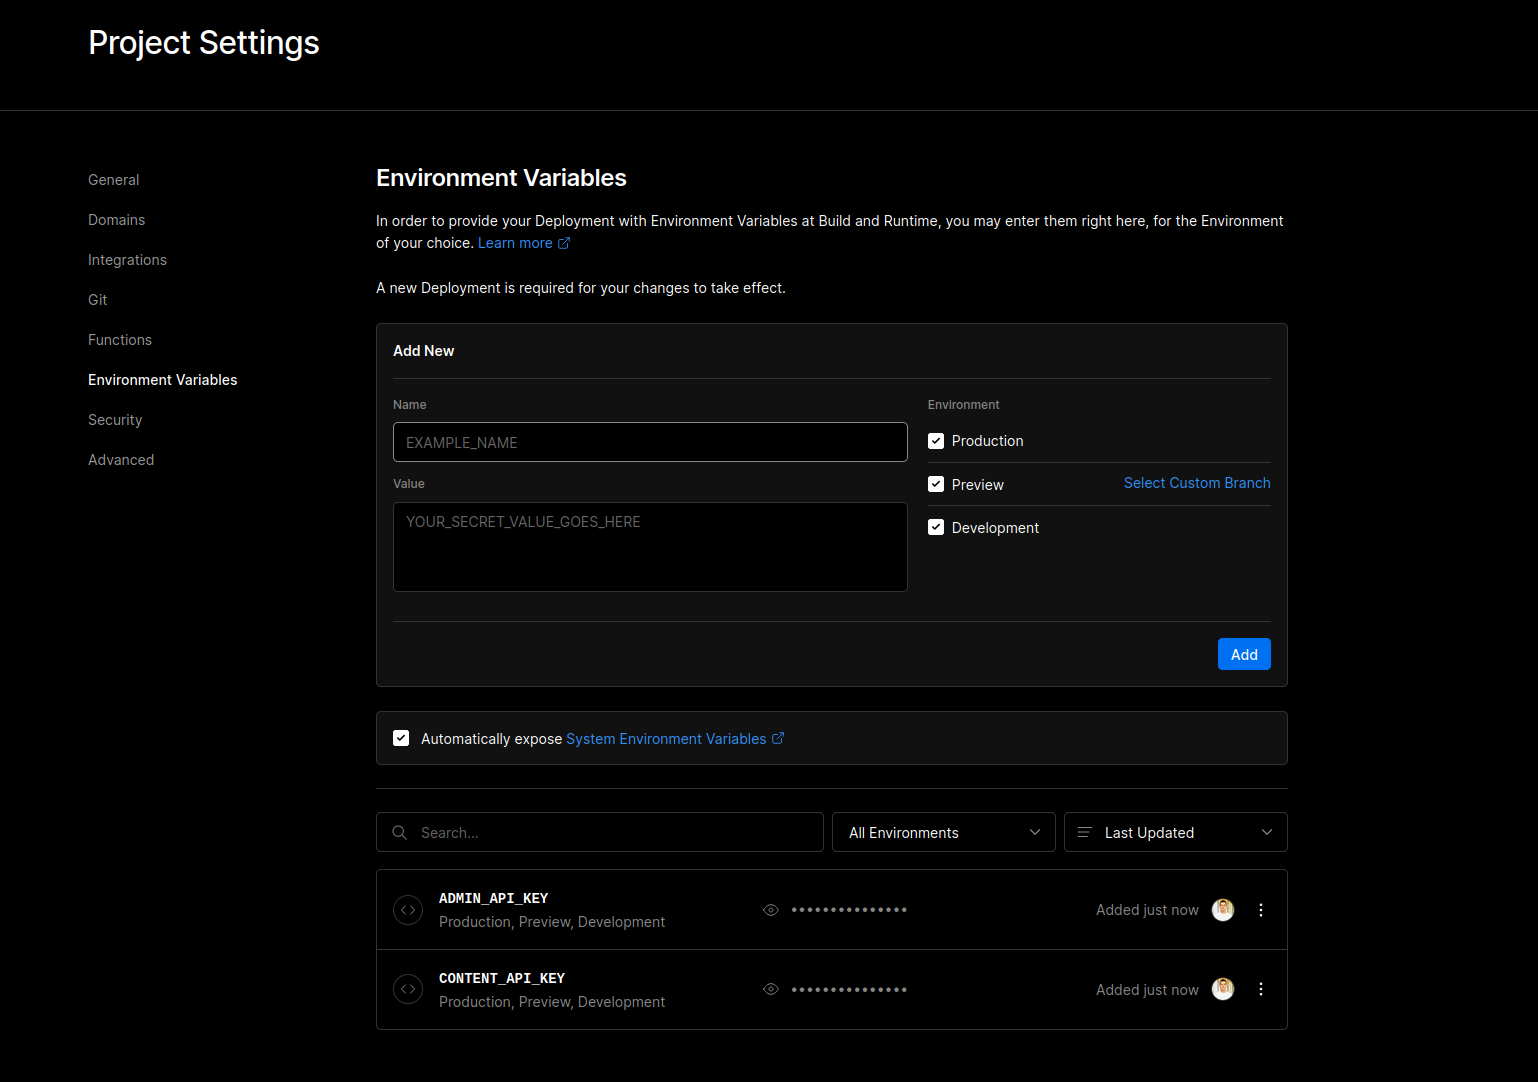
Dont forget to add the environment variables to your production build, in this case I added them to my vercel project
Integrate the Javscript Client
Here are the official docs:

npm install @tryghost/content-apiCreating an article card
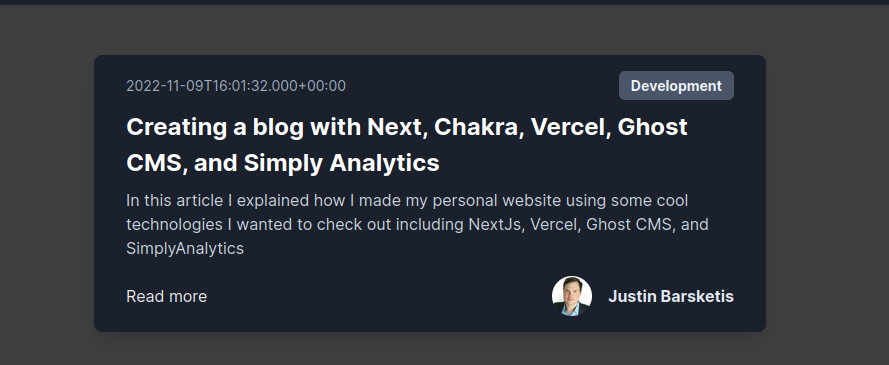
I took "inspiration" from Choc UI, they had a nice looking article card that is open source. It had some funky non default components however so I changed them out for the default Chakra components, and I also added in props for the eventual data being passed down.

import { Flex, Box, Text, Image, Link } from "@chakra-ui/react"

const ArticleCard = ({ published_at, title, excerpt, primary_tag, slug }) => {
  console.log(primary_tag)
  return (
    <Flex
      bg="#edf3f8"
      _dark={{
        bg: "#3e3e3e",
      }}
      p={50}
      w="full"
      alignItems="center"
      justifyContent="center"
    >
      <Box
        mx="auto"
        px={8}
        py={4}
        rounded="lg"
        shadow="lg"
        bg="white"
        _dark={{
          bg: "gray.800",
        }}
        maxW="2xl"
      >
        <Flex justifyContent="space-between" alignItems="center">
          <Text
            fontSize="sm"
            color="gray.600"
            _dark={{
              color: "gray.400",
            }}
          >
            {published_at}
          </Text>
          <Link
            px={3}
            py={1}
            bg="gray.600"
            color="gray.100"
            fontSize="sm"
            fontWeight="700"
            rounded="md"
            _hover={{
              bg: "gray.500",
            }}
          >
            {primary_tag}
          </Link>
        </Flex>

        <Box mt={2}>
          <Link
            fontSize="2xl"
            color="gray.700"
            href={`/articles/${slug}`}
            _dark={{
              color: "white",
            }}
            fontWeight="700"
            _hover={{
              color: "gray.600",
              _dark: {
                color: "gray.200",
              },
              textDecor: "underline",
            }}
          >
            {title}
          </Link>
          <Text
            mt={2}
            color="gray.600"
            _dark={{
              color: "gray.300",
            }}
          >
            {excerpt}
          </Text>
        </Box>

        <Flex justifyContent="space-between" alignItems="center" mt={4}>
          <Link
            color="brand.600"
            _dark={{
              color: "brand.400",
            }}
            _hover={{
              textDecor: "underline",
            }}
            href={`/articles/${slug}`}
          >
            Read more
          </Link>

          <Flex alignItems="center">
            <Image
              mx={4}
              w={10}
              h={10}
              rounded="full"
              fit="cover"
              display={{
                base: "none",
                sm: "block",
              }}
              src="/Justin-Barsketis-Headshot.jpg"
              alt="avatar"
            />
            <Link
              color="gray.700"
              _dark={{
                color: "gray.200",
              }}
              fontWeight="700"
              cursor="pointer"
            >
              Justin Barsketis
            </Link>
          </Flex>
        </Flex>
      </Box>
    </Flex>
  )
}
export default ArticleCard
And Finally, pulling down the data into the cards, I left some extra fields in case you had multiple authors or want to add a featured image.
export default function Articles() {
  const api = new GhostContentAPI({
    url: "https://grow.barsketis.com",
    key: process.env.CONTENT_API_KEY,
    version: "v5.0",
  })

  const [posts, setPosts] = useState([])
  useEffect(() => {
    api.posts
      .browse({
        limit: "all",
        include: "tags,authors",
      })
      .then((posts) => {
        console.log("posts", posts)
        setPosts(posts)
      })
      .catch((err) => {
        console.error(err)
      })
  }, [])

  return (
    <div>
      <Head>
        <title>Welcome to Articles</title>
        <meta name="description" content="Justin Barsketis Blog" />
        <link rel="icon" href="/favicon.ico" />
      </Head>
      <Header />

      <main style={{ flexGrow: "1" }}>
        {posts.map((post) => (
          <ArticleCard
            key={post.id}
            title={post.title}
            slug={post.slug}
            excerpt={post.excerpt}
            // feature_image={post.feature_image}
            // primary_author={post.primary_author}
            primary_tag={post.primary_tag.name}
            published_at={post.published_at}
          />
        ))}
      </main>

      <footer>{/* <Footer /> */}</footer>
    </div>
  )
}
Success!
Making an Article Page
Now we just need to make an article page using dynamic routes, easy peasy!